
Setup Wizard
Walk through the four-step wizard to create your organization, set your profile, and configure locations and roles.
After verifying your email, ClinicShifts walks you through a four-step setup wizard. The entire process takes just a few minutes.
Step 1: Organization Info
Enter the basic details about your medical group or practice.
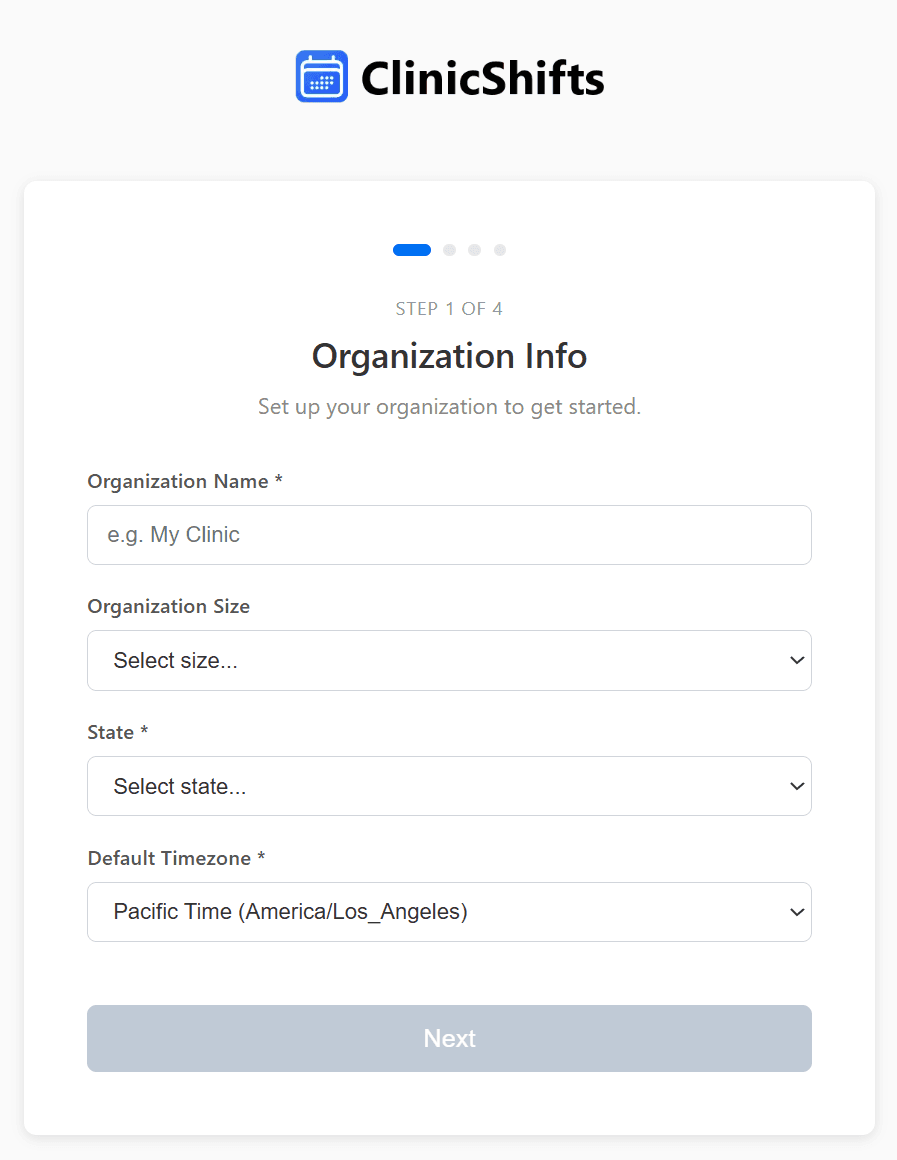
- Organization Name — the name of your medical group (e.g., "Fernvale Physician Group")
- Organization Size — select the approximate size of your team
- State — the state where your organization operates
- Default Timezone — your organization's primary timezone for scheduling
Click Next to continue.
Step 2: Your Profile
Tell us about yourself and choose your admin role.
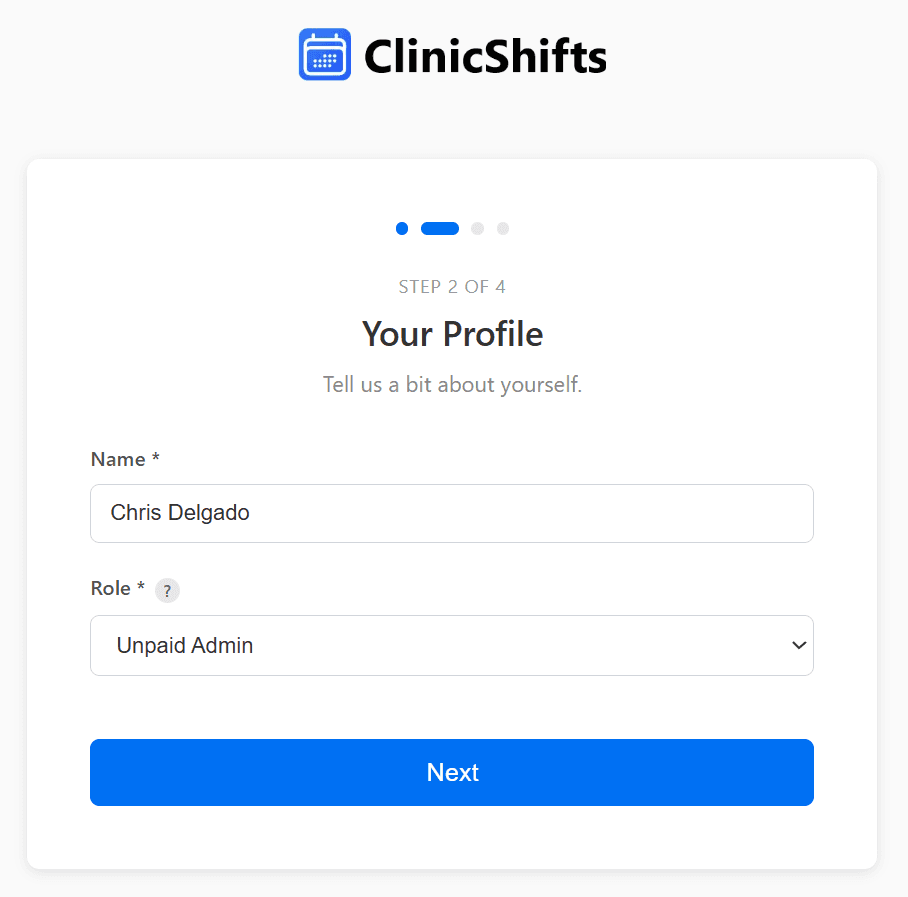
- Name — your full name (pre-filled from registration)
- Role — choose between two admin types:
| Role | Description | Billing |
|---|---|---|
| Paid Admin | Choose this if you are also a provider who will be assigned to shifts | Counts as a paid seat |
| Unpaid Admin | Choose this if you only manage schedules and will never be assigned to shifts | Does not count as a paid seat |
This distinction matters because ClinicShifts uses per-provider pricing. If you are purely an administrator and won't appear on the schedule, select Unpaid Admin to avoid an unnecessary seat charge.
Click Next to continue.
Step 3: Add Locations
Enter the facilities or locations where your providers work.
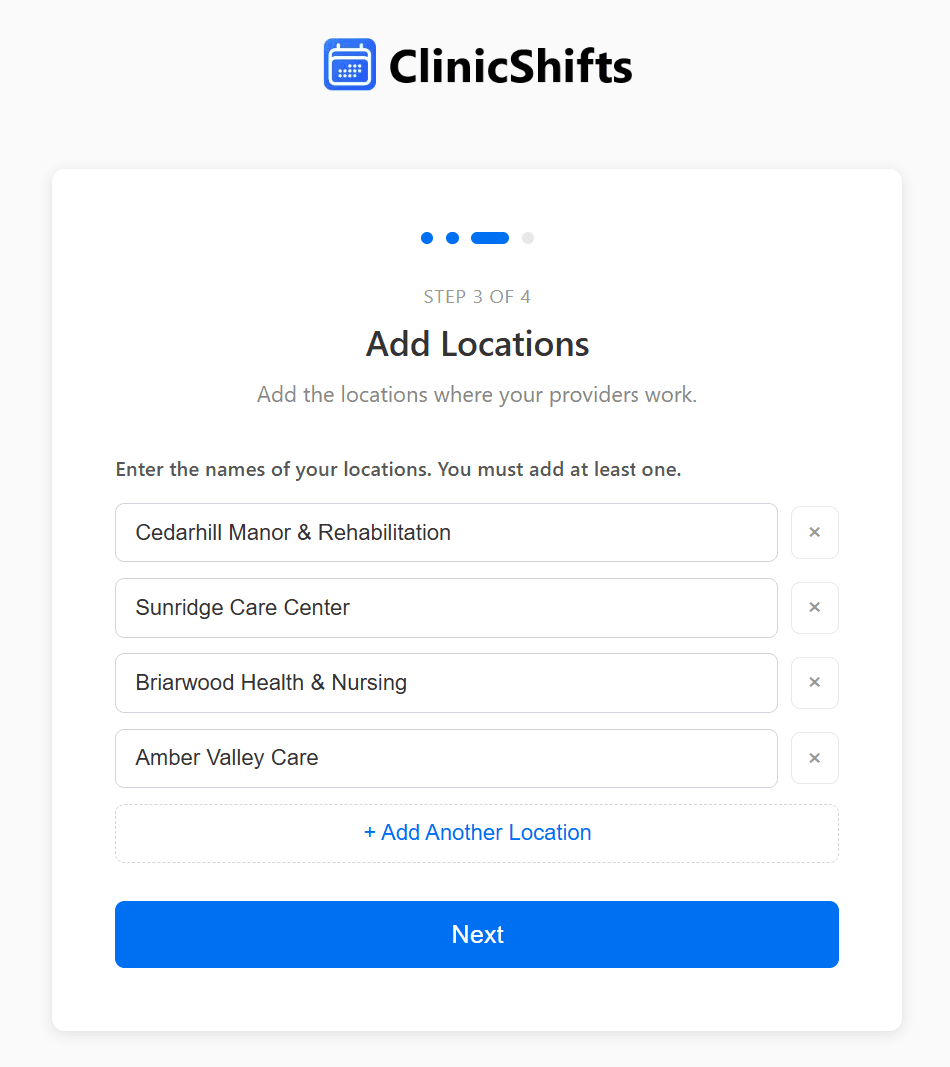
- Type the name of each location (e.g., "Cedarhill Manor & Rehabilitation", "Sunridge Care Center")
- Click + Add Another Location to add more
- You must add at least one location
Tip: If your practice operates from a single location, you can still use locations to represent departments or service lines for organizational purposes.
Click Next to continue.
Step 4: Add Roles
Define the provider roles used in your organization for scheduling.
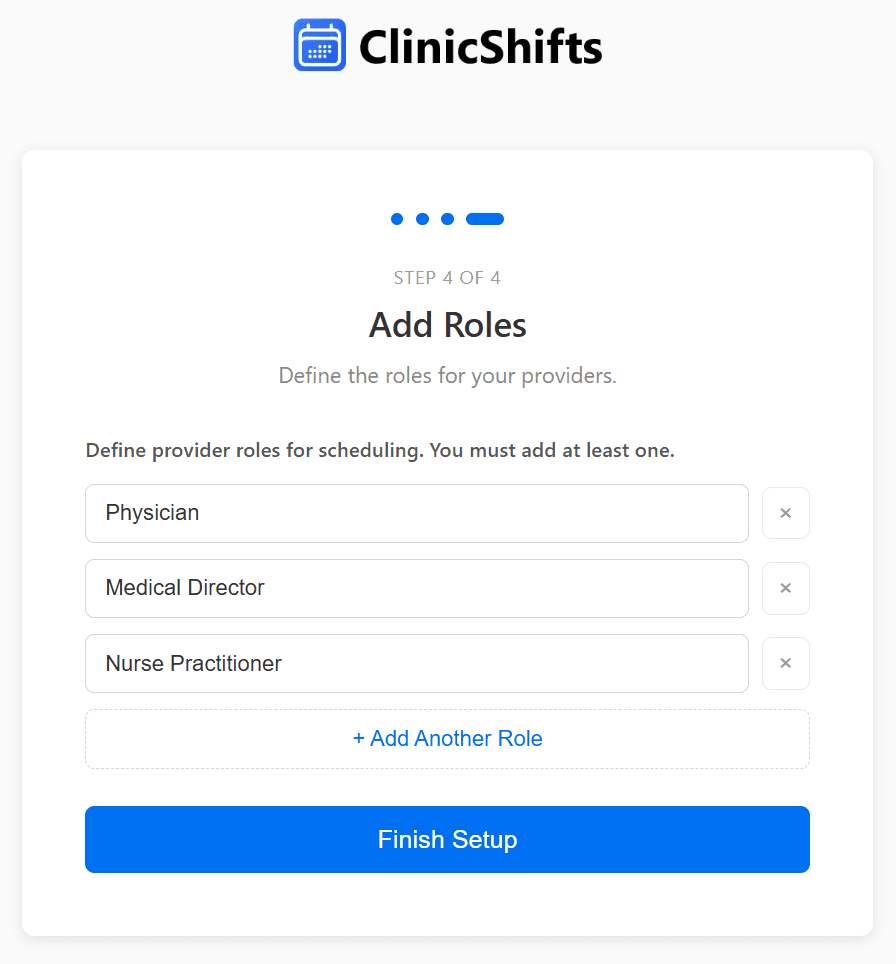
- Enter role names such as "Physician", "Nurse Practitioner", "Medical Director", etc.
- Click + Add Another Role to add more
- You must add at least one role
Roles help the system understand which providers are eligible for specific shifts. For example, if a shift requires a "Physician", only providers with that role are suggested for it.
Click Finish Setup to complete the wizard.
After Setup
Once setup is complete, you land on the Schedule page, ready to build your first month.
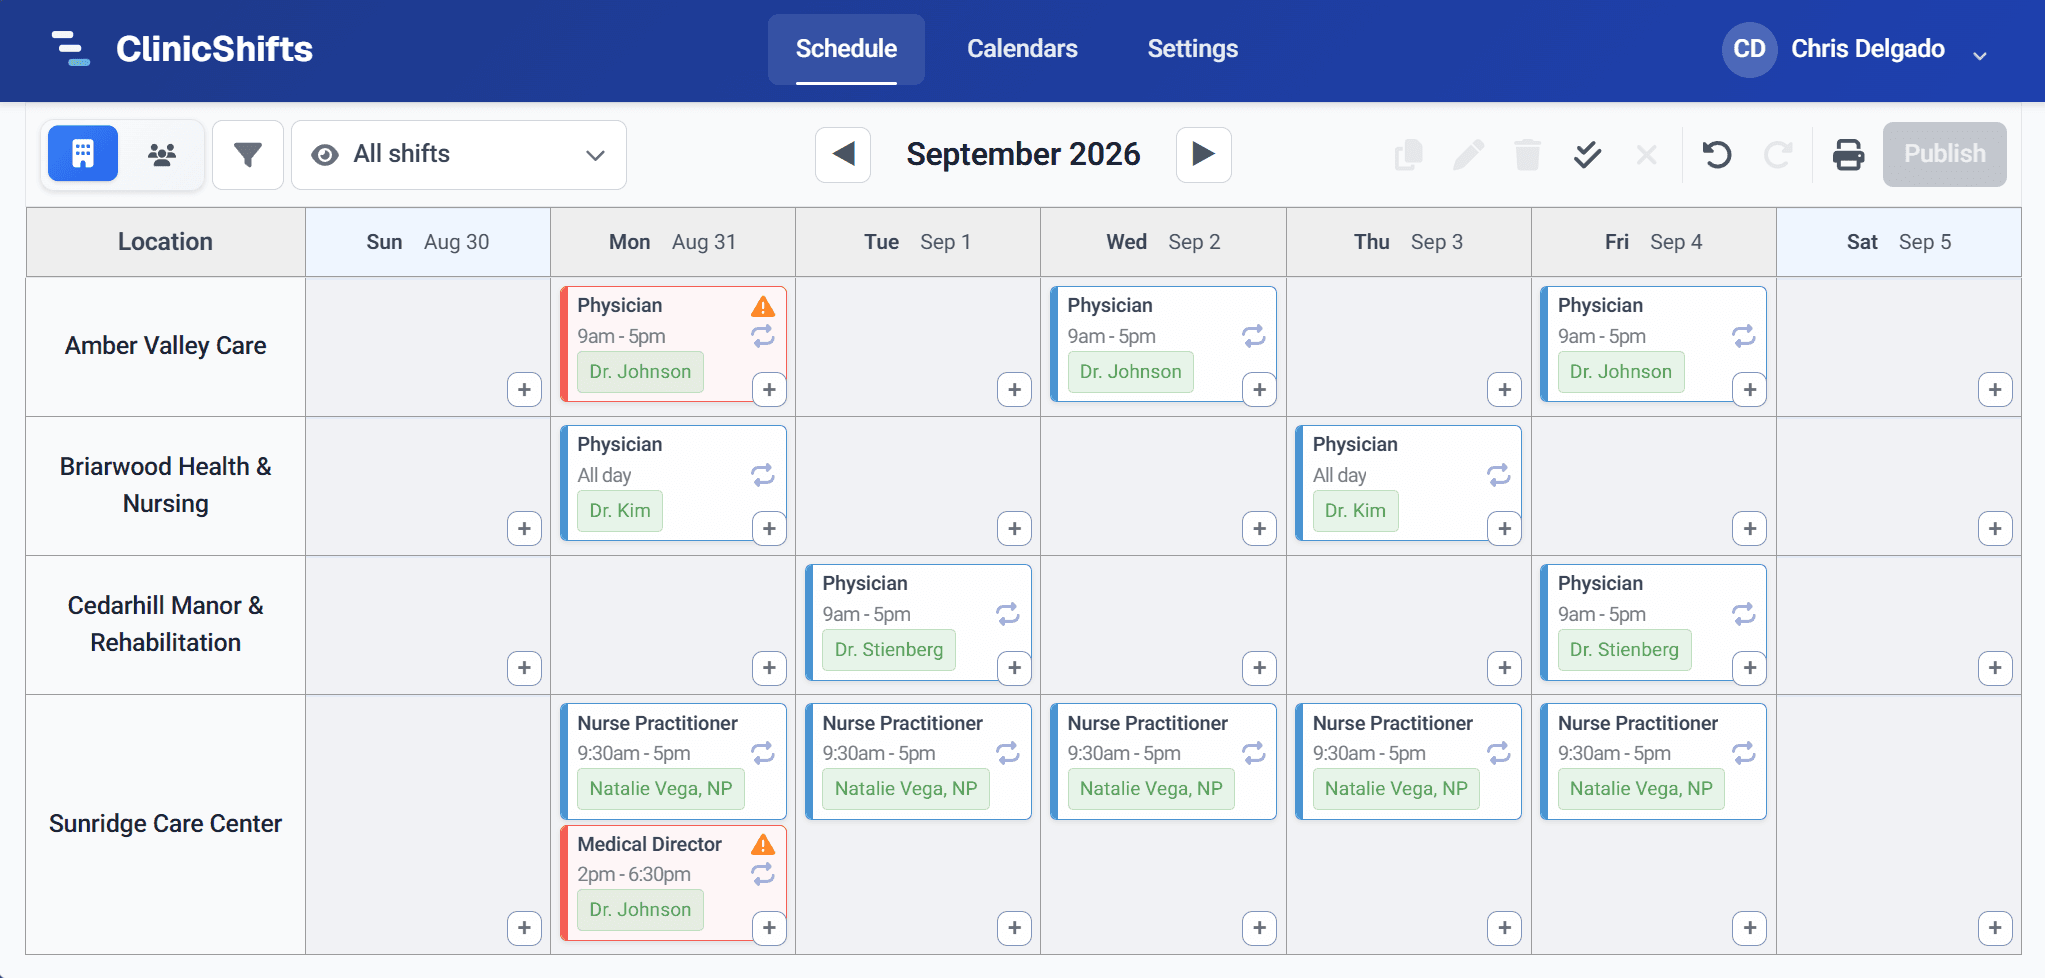
Before creating shifts, we recommend completing a few more configuration steps:
- Add your team members in Settings → Employees, with their roles and locations
- Create your first shift on the schedule
Prefer not to do this yourself? Email your current schedule to support@clinicshifts.com and we will import it and set up your providers and facilities for you.